Add source file
A project consists of files. The source file is located in a folder and has a filename.
Each file needs to be assigned with the following attributes:
- File ID. This is a unique identifier for this file within this project.
- Parser. Select the Rigi parser that must be used for this file. Rigi comes with several parsers. It is possible to implement your own parsers using the Rigi Parser SDK.
- Target rule.
All source files in the Piwik demo application have the same name: en.json.
The following steps explain how to add one source file at a time.
- In the tree view, select the file that must be added.
- Right-click to see the context menu.
- Select Include in project.
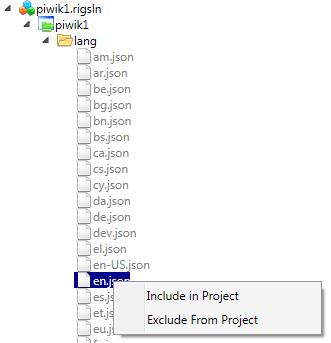
The file is added to the source files overview. The File ID gets a unique name (name of the file plus an optional number), a default Parser is assigned (based on the extension) plus a target rule.
- You can change the File ID. File IDs are usually short names. Make sure that each File ID is unique within a project.
- Make sure that the correct Parser and Target rule are selected.
Under the hood, the file is added to the .rigproj file: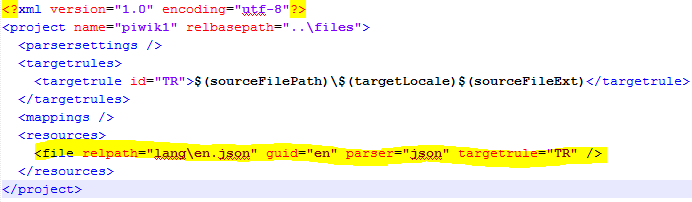
You can add additional files by repeating the previous steps.
Tip: you can select multiple files at once using the Search/Apply function. This is explained in section Mass adding source files.